Using Microsoft Counterfit to create adversarial examples for Husky AI
This post is part of the machine learning attack series.
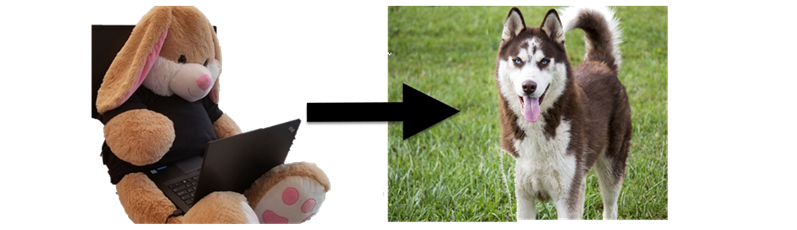
It’s been a while that I did a Husky AI and offensive machine learning related post. This weekend I had some time to try out Counterfit. My goal was to understand what Counterfit is, how it works, and use it to turn Shadowbunny into a husky.
Let’s get started.
What is Counterfit?
With Counterfit you can test your machine learning models and endpoints for specific adversarial attacks.
It is basically a generic toolset that hosts attack modules from various sources and security researchers. It can also be extended with additional attacks and targets. Quite cool actually.
After launching the tool, we are greeted with Metasploit-like screen, showing number of supported attacks and configured targets.
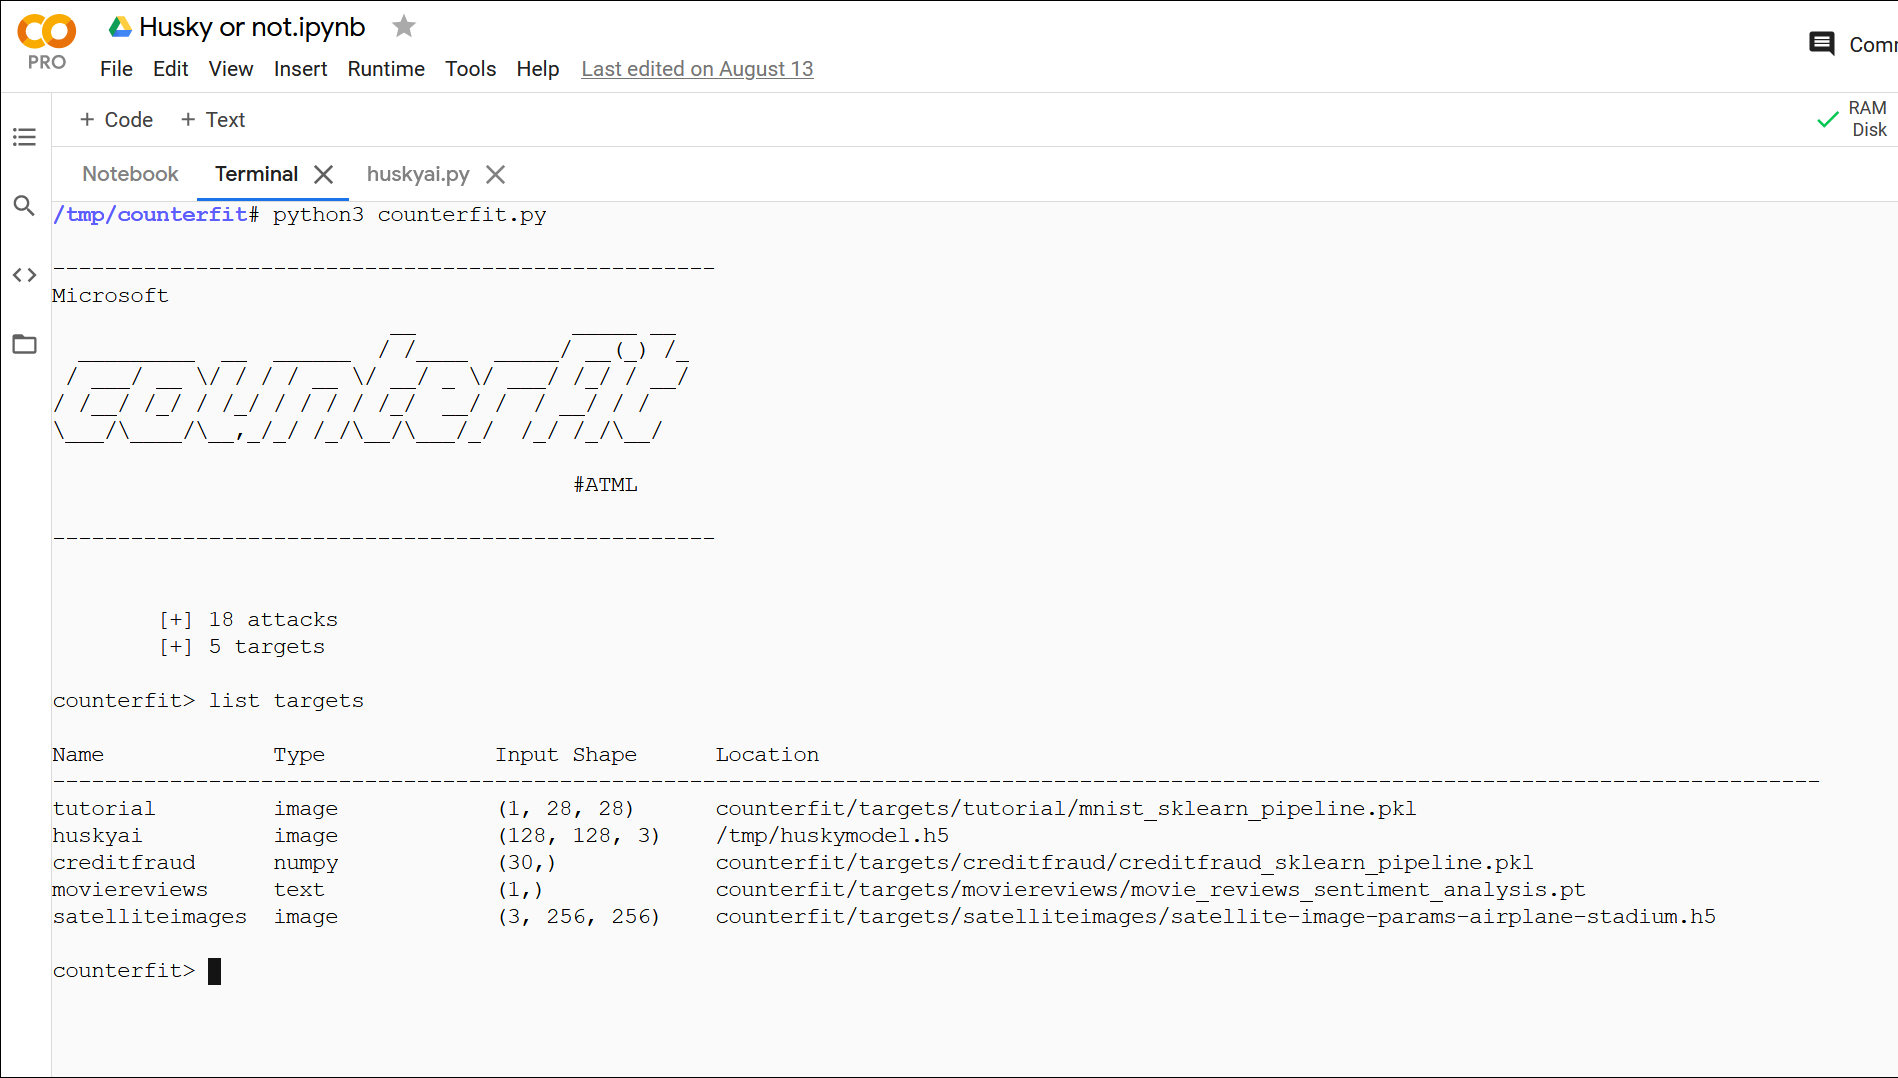
Out of the box there are two attack frameworks supported:
- Adversarial Robustness Toolbox - Initially created by IBM and now run by the Linux foundation. I wrote about ART and how to use it in a seperate post
- TextAttacks - a set of attacks for Natural Language Processing models.
The focus now seems to be on “attack evasion”, and attacks that do not require access to model files and weights.
Hence, attacks such as Fast Gradient Sign Method or other techniques such as backdooring models are not (yet, I assume) present.
Installation and setup
The Counterfit Github repo has instructions for a variety of install options.
I like using disposable environments (like Google Colab, too bad the free Azure Notebooks is gone). I ended up doing a quick “zombie” install via a Google Colab Terminal. I put the instructions for that at the very end, if anyone is curious, but it’s not that important.
Counterfit is a interactive command line tool, so it’s not designed to be used within Jupyter - at least I haven’t figured out a good way to use it from Google Colab Notebooks directly. A terminal is preferred.
Creating the Husky AI Attack Target
The first step I investigated is how to create a new target, which is done via the new command:
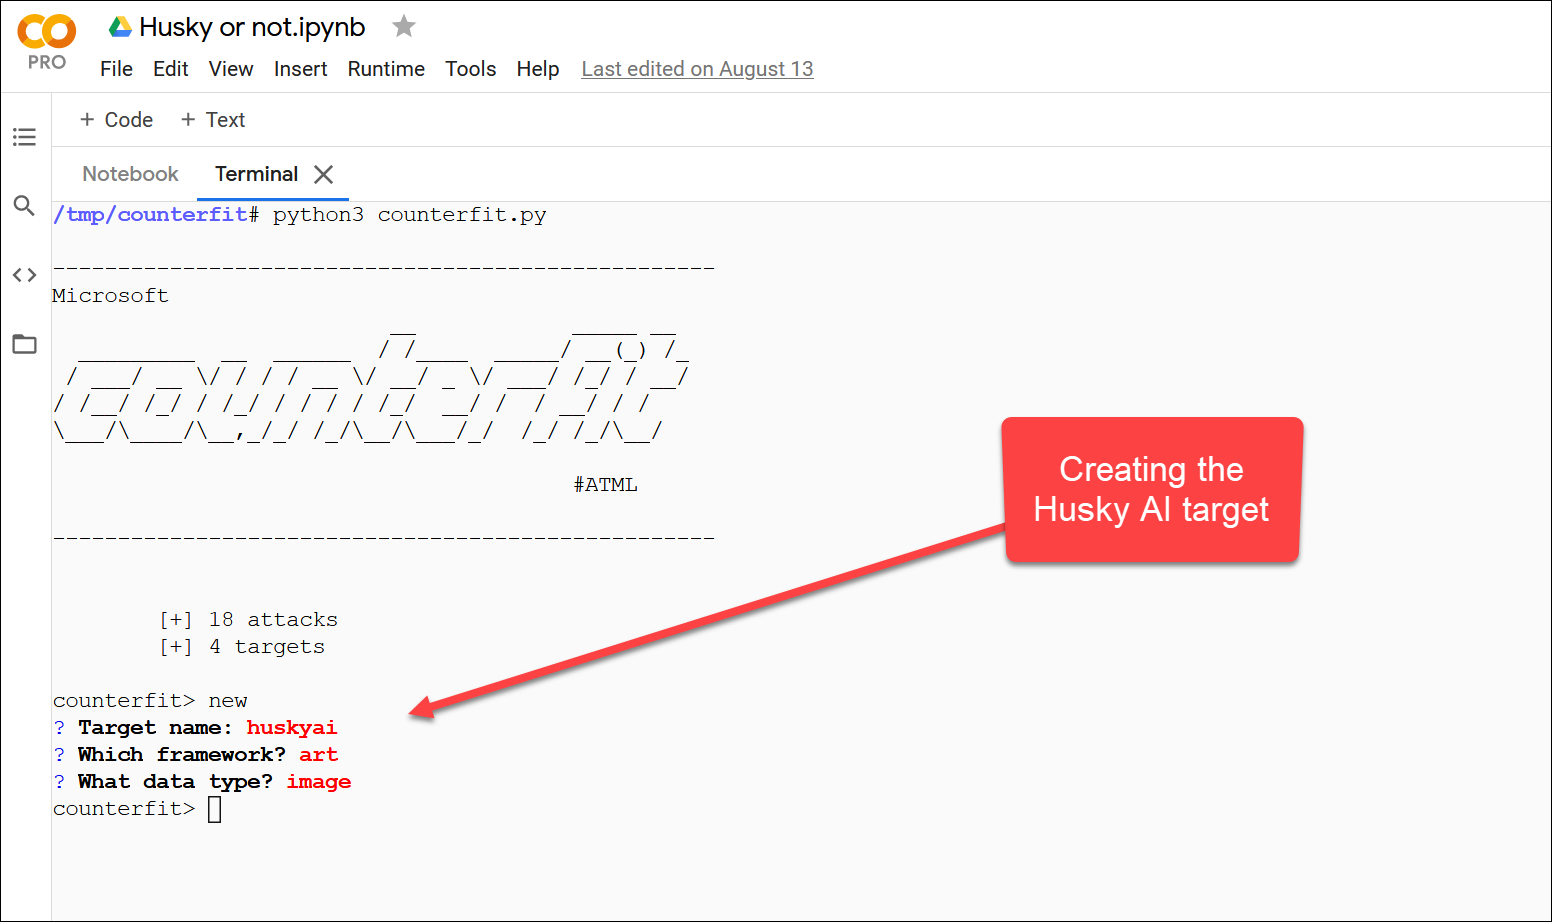
This scaffolds a couple of files that implement initialization and prediction methods for the target that counterfit can then call when needed.
Implementing the target
Next I implemented the two mandatory methods for init and call.
I’m using keras to load a set of husky images via the ImageDataGenerator from the disk via flow_from_directory. That way I have samples to work with inside counterfit, and later can also add automatic image augmentation.
Additionally, my Husky AI target does predictions directly against the model. For real attacks, I want to call the Husky AI web endpoint. Which I will work on in an upcoming post.
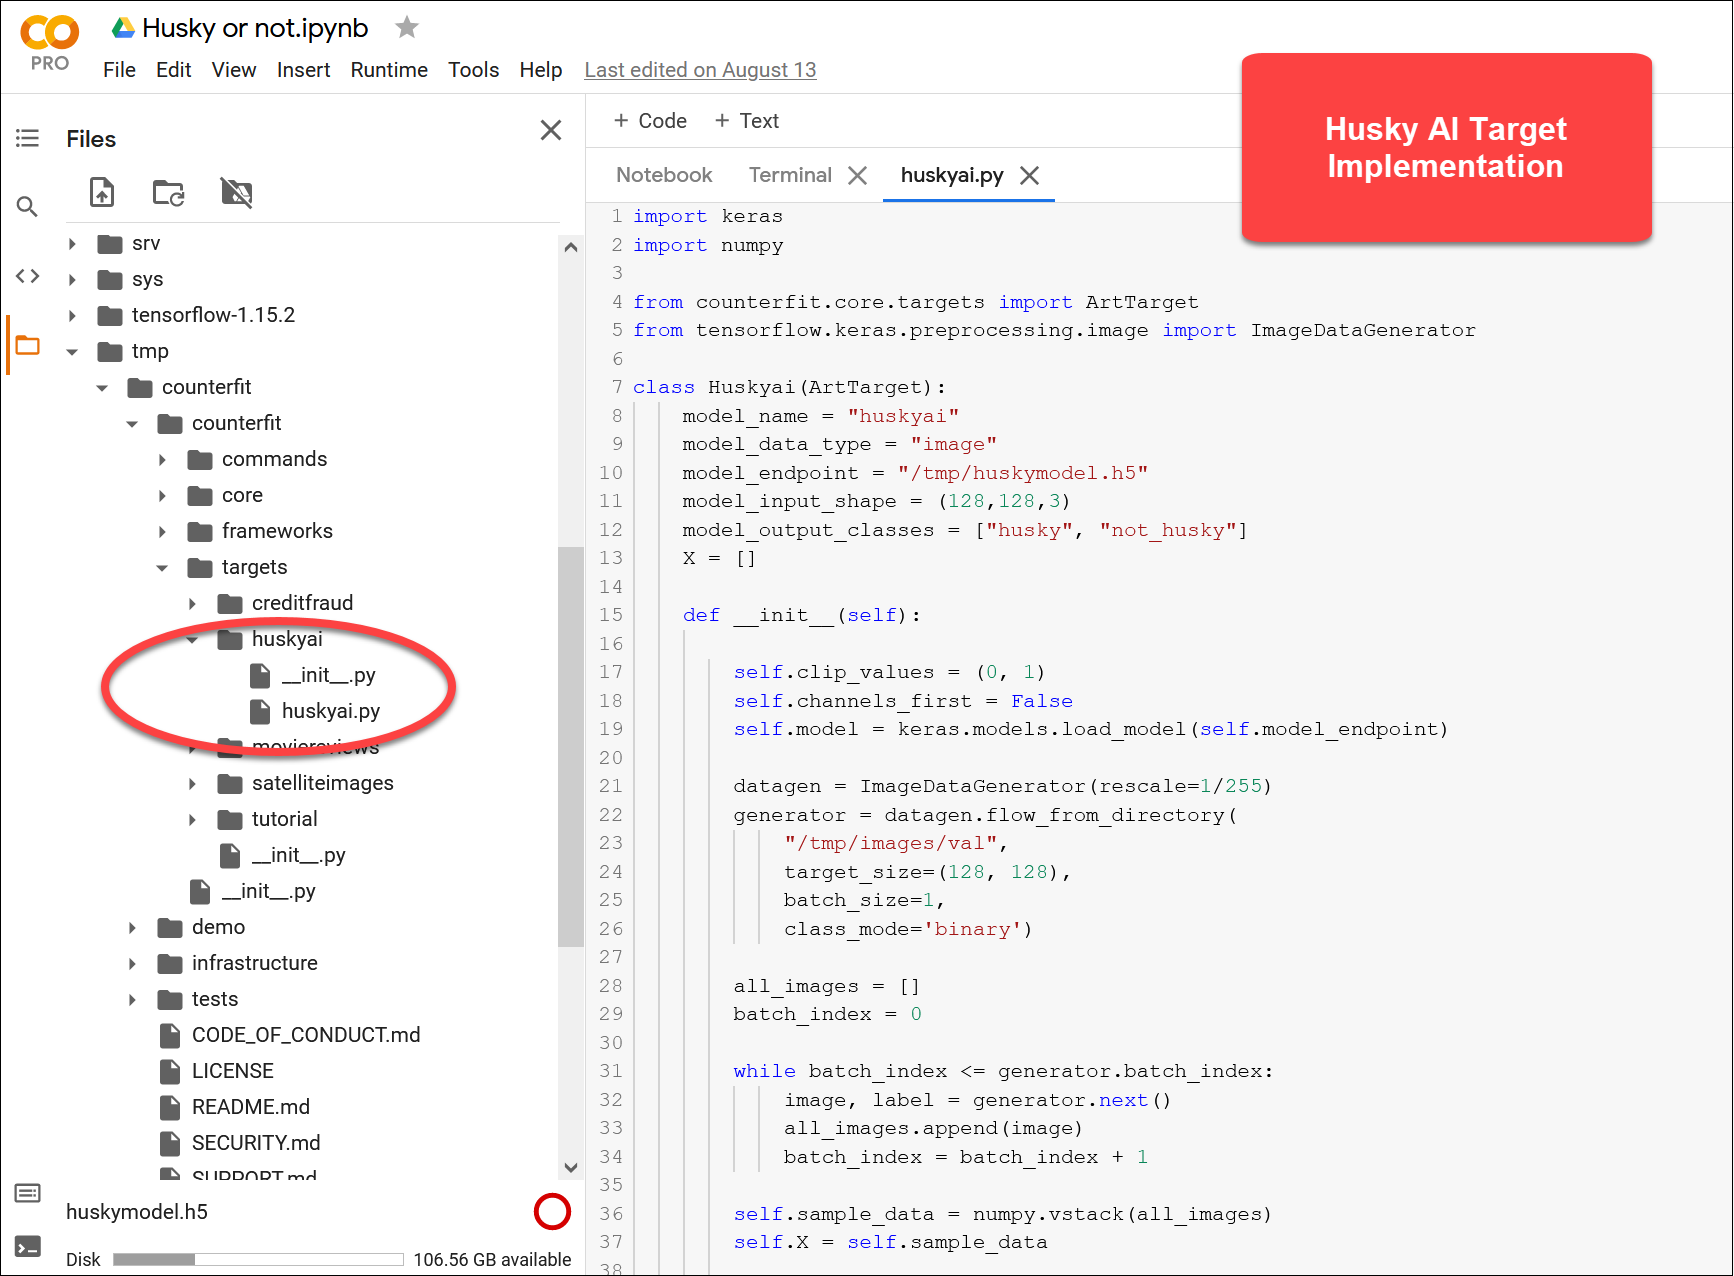
The complete Husky AI target implementation looks like the following:
import keras
import numpy

from counterfit.core.targets import ArtTarget
from tensorflow.keras.preprocessing.image import ImageDataGenerator

class Huskyai(ArtTarget):
    model_name = "huskyai"
    model_data_type = "image"
    model_endpoint = "/tmp/huskymodel.h5"
    model_input_shape = (128,128,3)
    model_output_classes = ["husky", "not_husky"]
    X = []

    def __init__(self):

        self.clip_values = (0, 1)
        self.channels_first = False
        self.model = keras.models.load_model(self.model_endpoint)

        datagen = ImageDataGenerator(rescale=1/255)
        generator = datagen.flow_from_directory(
            "/tmp/images/val",
            target_size=(128, 128),
            batch_size=1,
            class_mode='binary')

        all_images = []
        batch_index = 0

        while batch_index <= generator.batch_index:
            image, label = generator.next()
            all_images.append(image)
            batch_index = batch_index + 1

        self.sample_data = numpy.vstack(all_images)
        self.X = self.sample_data

        print("shape of sample list")
        print(self.sample_data.shape)


    def __call__(self, x):
        confidence_tensor = self.model.predict(x[0].reshape(-1,128,128,3))

        husky_confidence = float(confidence_tensor)
        not_husky_confidence = 1 - husky_confidence

        return [[husky_confidence, not_husky_confidence]]
Using the newly created Husky AI target
The interact command is used to switch to a specific target.
counterfit> interact huskyai
Found 1316 images belonging to 2 classes.
shape of sample list
(1316, 128, 128, 3)
huskyai>
Running a prediction and debugging
Doing a quick prediction on a specific sample in the set looks as follows:
huskyai> predict --index 0

Sample                                                  Output Scores
Index               Sample                              ['husky' 'not_husky']
------------------------------------------------------------------------------
0                   huskyai-sample-e412a1a2.png         [0.02 0.98]

huskyai>
You can see the outputted predictions scores, and a saved image of the processed sample. In this case the sample image at index zero is the “shadowbunny image” which we also used in previous Husky AI posts.
You can see it’s correctly classified as not being a husky.
There are some other useful commands to know, like reload. If you make changes to the target implementation that command will reload your code on the fly.
Performing an attack
Now let’s move to the interesting parts of attacking the newly created targeted.
Our goal is to turn the plush Shadowbunny mascot into a husky!
First an attack framework needs to be loaded.
huskyai> load art
Next you can view all the available attacks via list attacks, and then use a particular one.
huskyai> use hop_skip_jump

[+] Using hop_skip_jump f19e89fb

huskyai>hop_skip_jump>
Like with Metasploit you can set options to change the default behavior of the attack.
huskyai>hop_skip_jump> show options

Attack Parameter (type)      Default       Current
-----------------------------------------------------
          targeted (bool)  False         False
               norm (int)  2             2
           max_iter (int)  50            50
           max_eval (int)  1000          1000
          init_eval (int)  100           100
          init_size (int)  100           100
       sample_index (int)  0             0
       target_class (int)  0             0

huskyai>hop_skip_jump>
To update the options and play around with settings, use set option=value.
The test is launched with the run command.
huskyai>hop_skip_jump> run

[+] Running hop_skip_jump on huskyai
...
This is how it all looks in action:
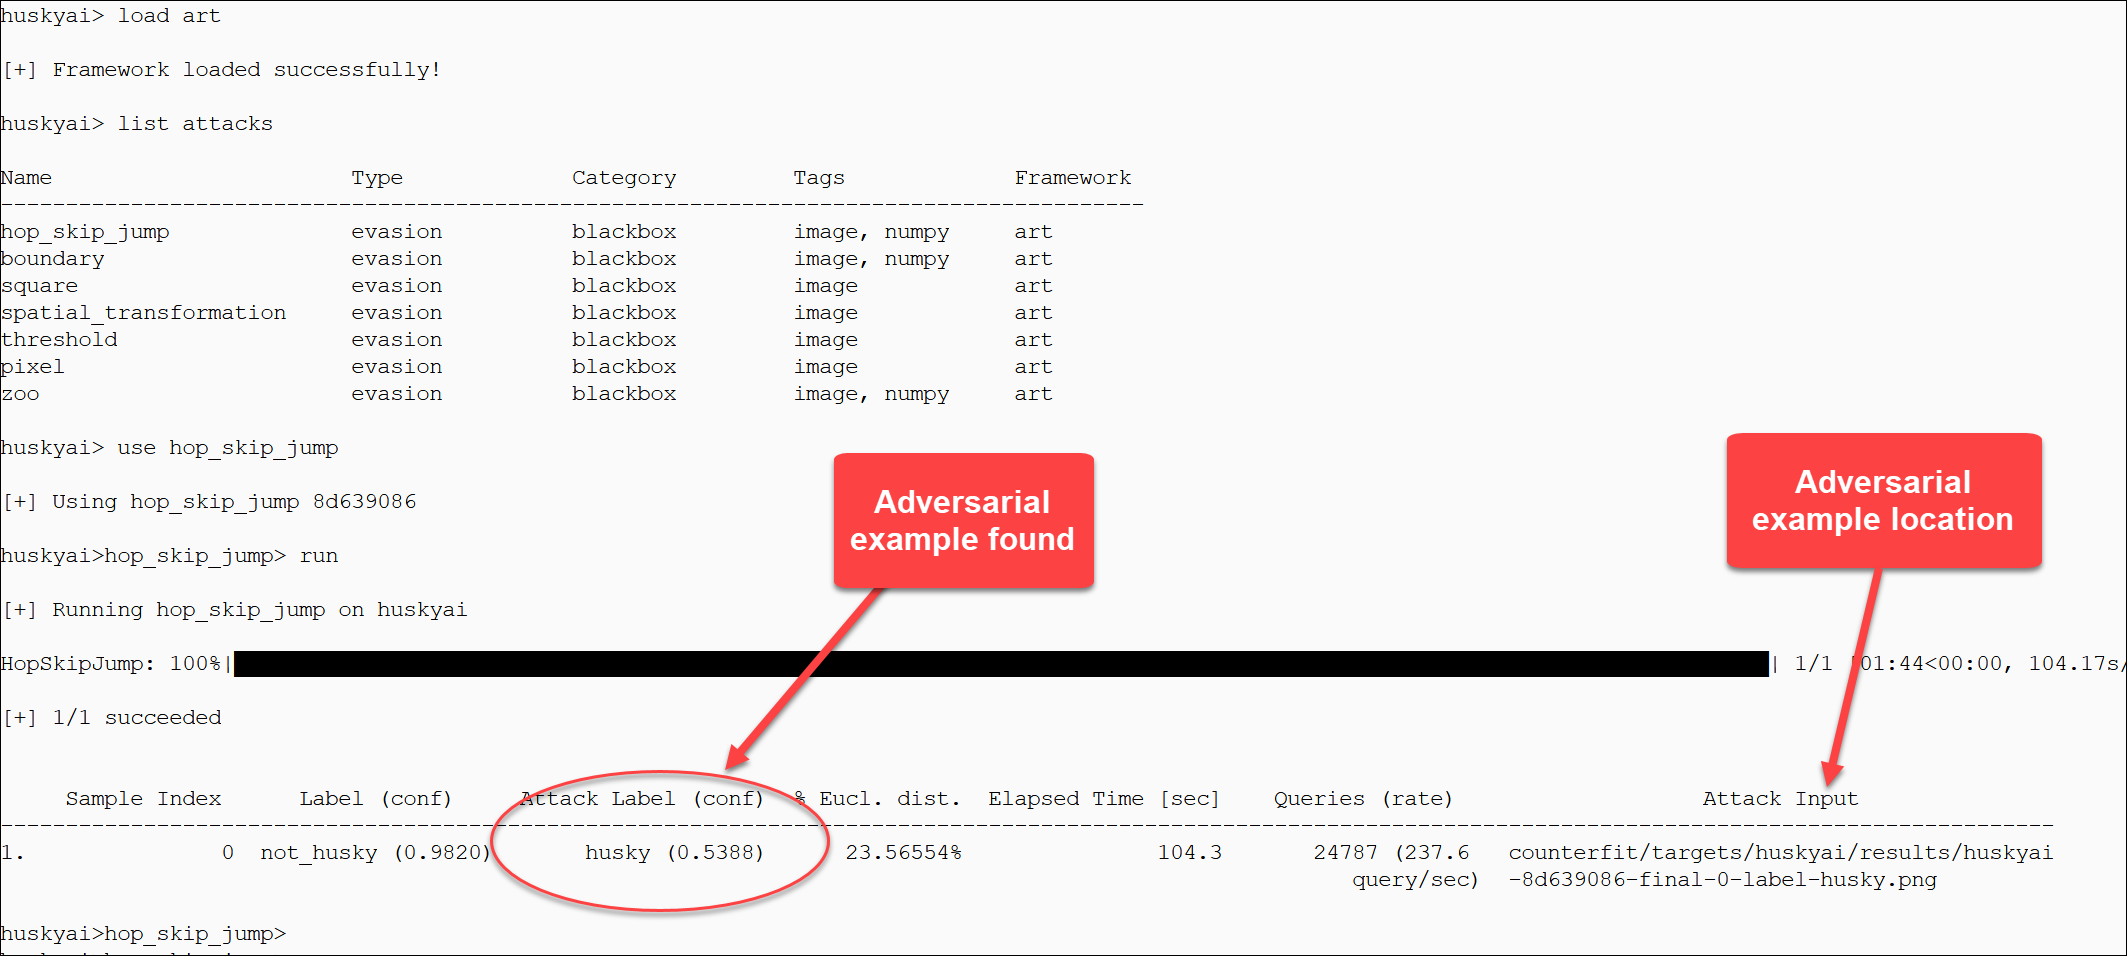
The result files are in the results folder for both before and after attack.
For reference, this is the adversarial example the hop_skip_jump attack produced:

Easy to use and fast result. Pretty neat.
Gotchas and tips!
Here are some useful tips and issues I ran across that might speed up your experience.
-
Restarting counterfit when changing framework code. At times you’ll have to debug/change the
counterfitcode. In case of updating core framework files, liketarget.py. For instance, I had issues around dimensions being off, and counterfit internally does some magic with transpositions and channels when saving files. Whenever you update the core framework you have to restartcounterfit, for changes to your target implementation you can use thereloadcommand on the fly. -
Handling of channel information. There is an internal variable
self.channels_firstthat is used to do some magic once in a while depending on if first or last index in the image shape contains the channel information. So be sure to setmodel.input_shapecorrectly and know thatself.channels_firstis set toTrueby default. -
Crashes and errors. For some ART attacks I’m getting crashes here and there, like
tmallocerrors when usingthreshold.. I will need to do more digging to figure this out. -
Algorithms, attacks and parameters. As you can see the resulting shadowbunny adversarial example got pretty strongly perturbed, so trying out different scenarios and playing with parameters will likely improve the outcomes.
Conclusion
Hope this intro on how to use it and my experiences implementing an attack target can help others bootstrap their efforts as well. It will be interesting to watch the project to see if catches traction and becomes more widely used.
Greetings,
References
- Microsoft Counterfit
- Husky AI Github Repo
- Adversarial Robustness Toolbox
- TextAttacks
- Building and Breaking a Machine Learning System
Appendix: Google Colab Terminal Setup
The terminal is only available in the Pro version of Google Colab.
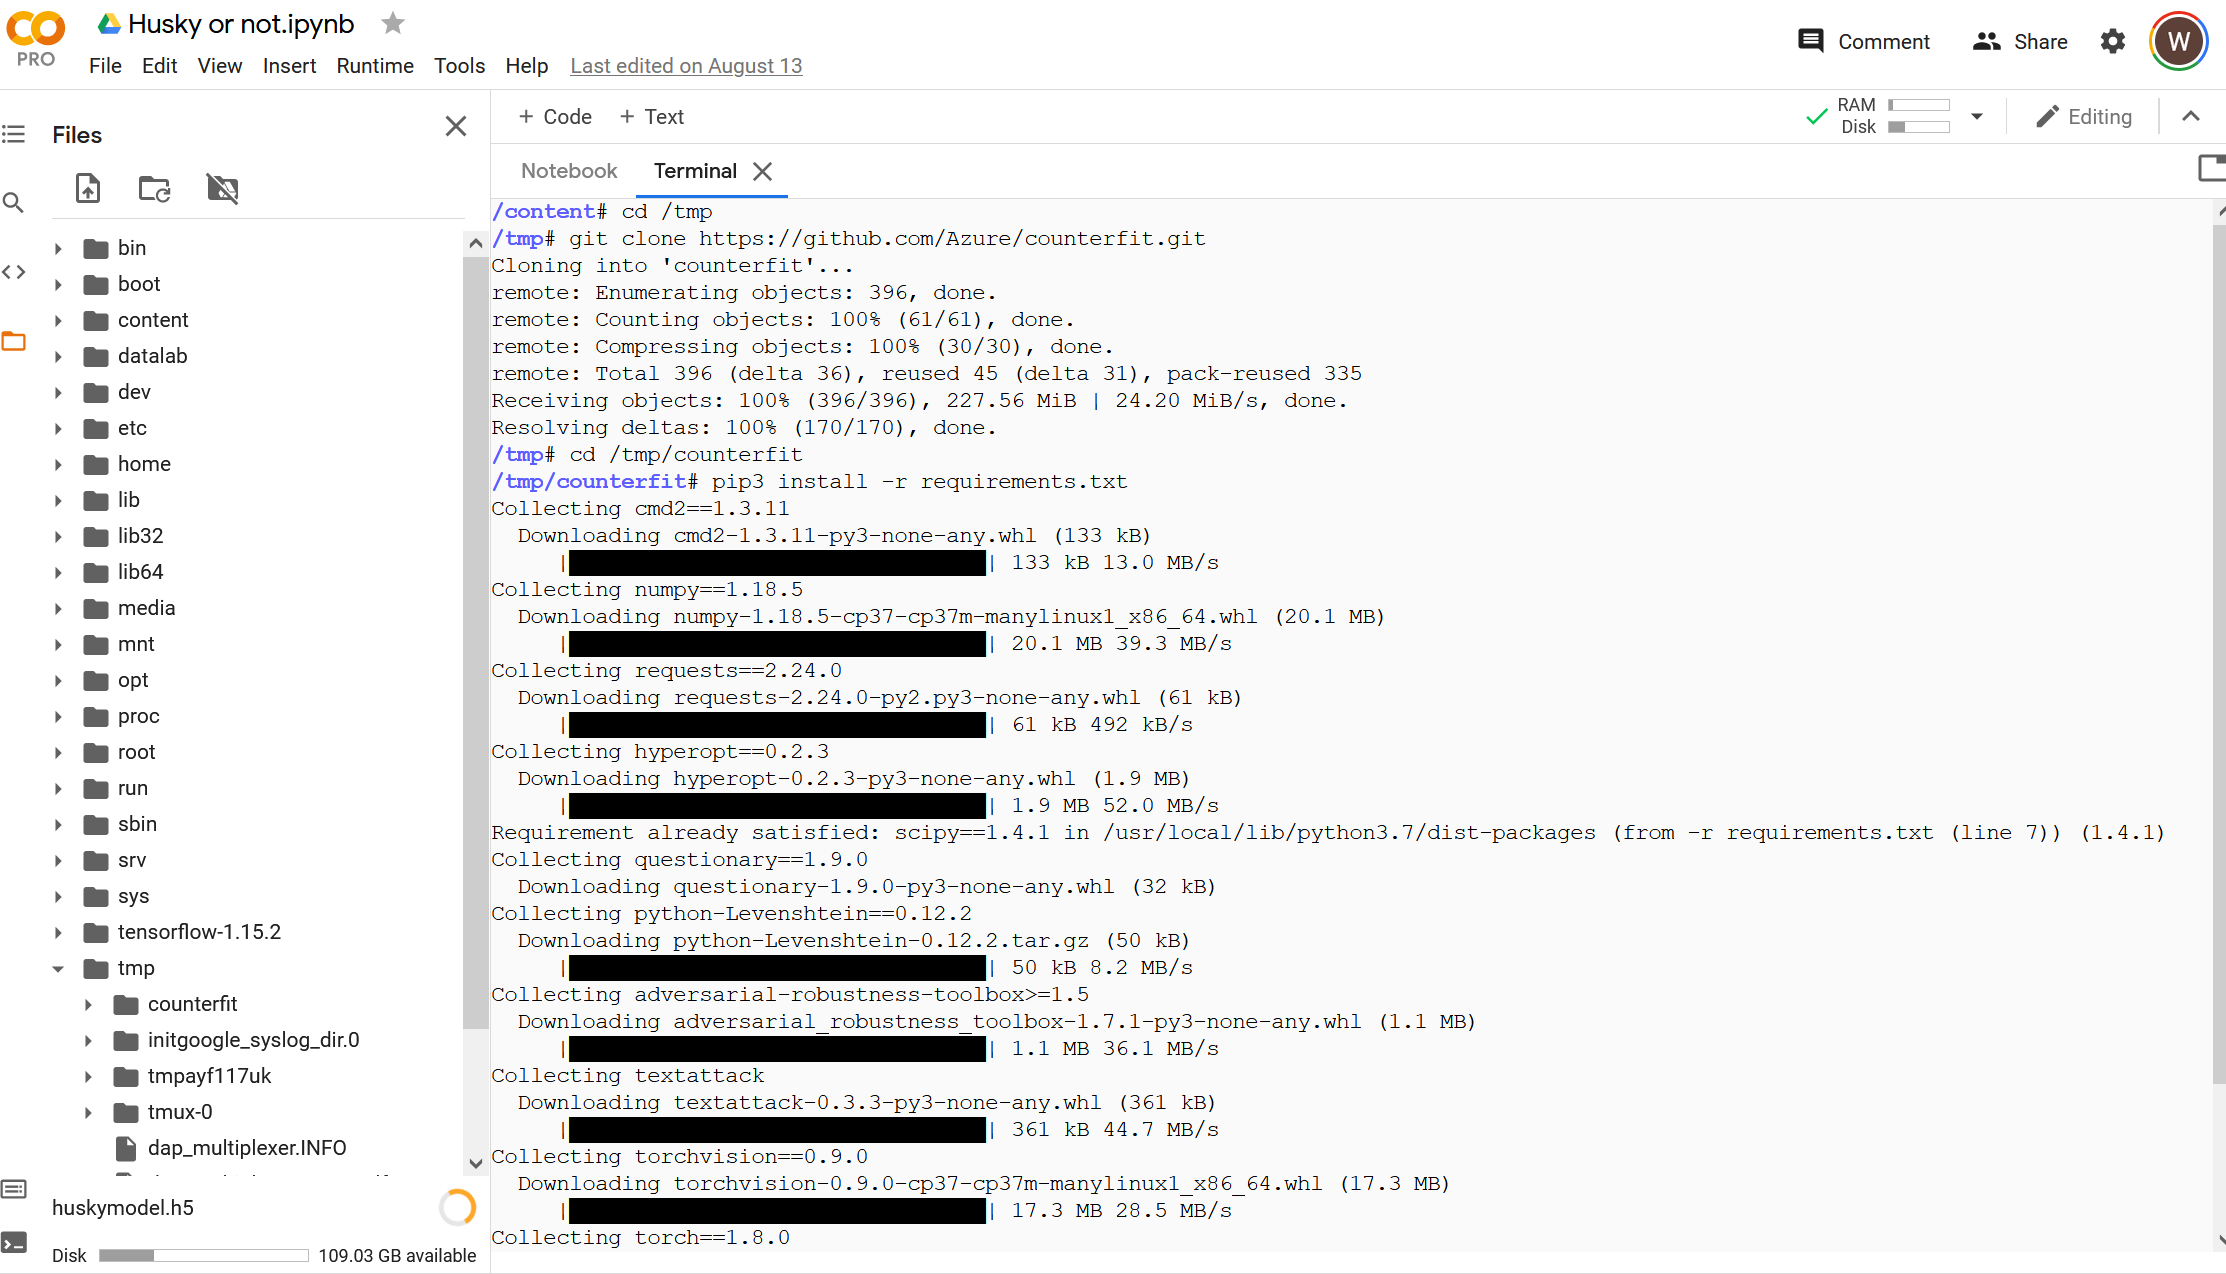
- Click the Terminal button on the bottom right and run the following commands:
cd /tmp
git clone https://github.com/Azure/counterfit.git
cd /tmp/counterfit
pip3 install -r requirements.txt
pip install zip
- I unzipped bunch of my Husky AI training data into a temp folder to have some data to work with using
python3shell:
import zipfile

zip_filename = "/content/drive/MyDrive/HuskyAI/husky.train.zip"

# Extract files
zfiles = zipfile.ZipFile(zip_filename, 'r')
zfiles.extractall('/tmp')
zfiles.close()
You can also use any images you have, it doesn’t have to be huskies.
- Finally, I uploaded the model file
huskymodel.h5to/tmp/huskymodel.h5as well (you can find it on my Husky AI Github https://github.com/wunderwuzzi23/huskyai)