Participating in the Microsoft Machine Learning Security Evasion Competition - Bypassing malware models by signing binaries
This year one of my goals was to learn about machine learning and artificial intelligence.
I wrote about my journey before - including what classes I took and books I read, the models and systems I built and operationalized, threat modeling it to learn about practical attacks and defenses. My goal is to be knowledge enough in the AI/ML space enough to be able to help bridge the gap between research and operational red teaming - by doing practical things with life systems.
In mid-August I learned that Microsoft and CUJO AI are hosting a Machine Learning Security Evasion Competition.
That aligned perfectly with my desire to continue learning more about machine learning and attacks.
Machine Learning security evasion competition
The competition took place over a course of multiple weeks, starting in June. It was split into a “Defender Challenge” and an “Attacker Challenge”.
I learned about the event a bit late, so only participated in the Attacker Challenge.
Attacker Challenge
There were three machine learning models that predict if a given file is malware or not.
The contestants were given 50 malware samples. The goal was to modify them to bypass the online hosted model. As an extra challenge the modified malware is still required to do its malicious deeds.
This sounded super fun!
What does ML have to do with malware detection?
In case you are not familiar with machine learning and how it can be used in malware detection, here is a quick overview. Feel free to skip this, if you are interested in the hacking.
The idea is to have a model that scores a given binary on how likely it is to be malware.
Windows uses the Portable Executable (PE) format as data structure to describe a binary image. An image contains the things Windows needs to load and run a binary, including the code and things such as strings, exports, imports, debug information and a lot more.
To train a model it takes taking thousands of existing malware samples and analyzing their properties. For instance one can analyze what strings binaries contain and what libraries are referenced and so forth. In machine learning this is called “feature extraction”.
The extracted features are then given to the model to train it on malware. During training the model is also given benign binaries to teach it how non-malware features look like in comparison. After many iterations (epochs) of training the outcome is hopefully a model with high accuracy on distinguishing malware from non-malware.
If you are interested to learn more check out Ember.
Hope that was a useful high level description in case you were wondering what this all is about.
Hacking the models
Now, it let’s talk about the hacking.
The event organizers provided code to optimize binaries with a set of techniques. There was also code to interact with one offline and the three online models. I ran the first offline attacks with the 50 malware samples to have a bit of a baseline. The following is an explanation of the two main ideas I tried to find more bypasses.
Attempt 1: Hiding messages in binaries
The day I learned about the competition I happened to read this blog post “Hiding messages in x86 binaries using semantic duals”. It is a interesting article about steganography. I thought that this might also help with evasion.
That same evening I went ahead to try it out. I noticed how it started to have impact on scoring, but the changes were minimal. So, this was not going to be fruitful.
Attempt 2: Authenticode signing binaries
Luckily, I already had a second idea in my head which I thought would be cool to try.
My goal was to run the binaries through optimization and afterwards “Authenticode Sign” the best scoring one.
To do that, I first created a “self-signed Microsoft” signing certificate:
$cert = New-SelfSignedCertificate -Type CodeSigningCert -Subject "Microsoft Corporation" -FriendlyName "Microsoft Authenticode" -CertStoreLocation Cert:\CurrentUser\My
This is how that looked like:
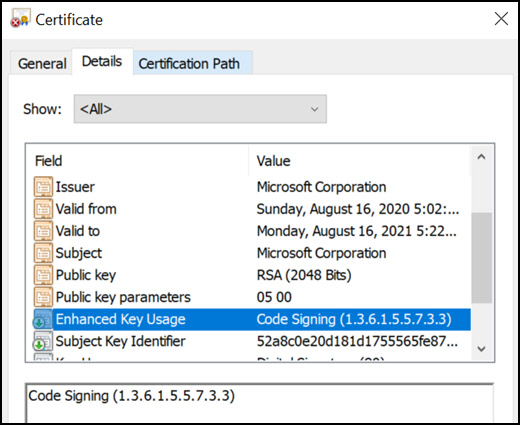
Looks pretty legit - or? :)
Automating signing Windows binaries on Linux
Since I do machine learning on Linux and I did not want to have to copy binaries back and forth I needed a way to sign Windows binaries on Linux. Hence, I exported the certificate to .pfx format and copied it over to a Linux host.
Then I used openssl to create the necessary files for signing:
openssl pkcs12 -in authenticode.pfx -nocerts -nodes -out key.pem
openssl rsa -in key.pem -outform PVK -pvk-strong -out authenticode.pvk
openssl pkcs12 -in authenticode.pfx -nokeys -nodes -out cert.pem
openssl crl2pkcs7 -nocrl -certfile cert.pem -outform DER -out authenticode.spc
Next, I added a Python function, called sign:
def sign(filename_to_sign):

        signed_filename = filename_to_sign+".signed"

        name = "Defender Protection Safe Smart Browsing Microsoft Azure Testing"*1200
        url  = "https://" + ("microsoft.com/" *3400)
        cp = subprocess.run(
            ["osslsigncode","sign","-pass","test","-h","sha512","-comm",
             "-n",name,
             "-i", url,
             "-in", filename_to_sign,
             "-out", signed_filename,
             #"-t", "[a time stamp server can be here]",
             "-certs","code/authenticode.spc",
             "-key","code/authenticode.pvk"]
        )

        if cp.returncode == 0:
            print("Successfully signed")
            with open(signed_filename, 'rb') as signedfile:
                signed_input_file_bytes = signedfile.read()
        else:
            print(f"Failed signing {cp.returncode}")
            signed_input_file_bytes = 0

        return signed_filename, signed_input_file_bytes
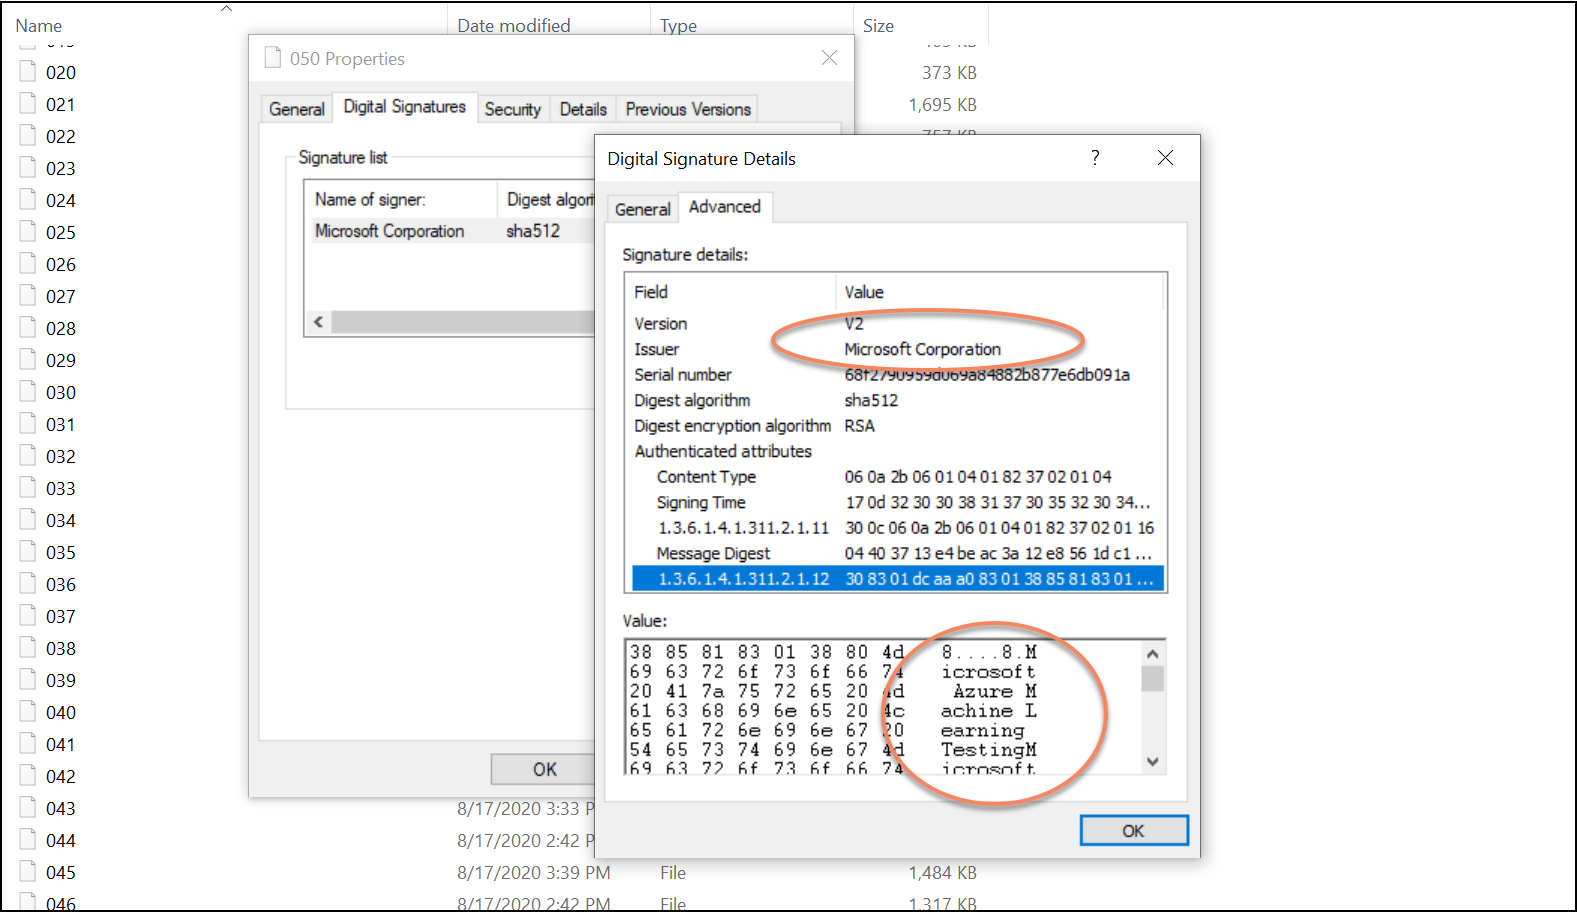
Notice how I strongly believed that strings like “Microsoft, Defender, Smart, Azure,…” would help with evasion. I also made the strings in the signatures quite long. I remember playing around with different strings a bit also.
An interesting behavior was regarding timestamping. It seems that signing with timestamp server improved results. Although, being a good Internet citizen, I did not use that too much.
Actually signing Windows binaries on Linux
First I tried the tool signcode, but for some reason that I can’t recall right now it did not work. Then I switched to osslsigncode which worked nicely.
This is how the very first signature looked like:
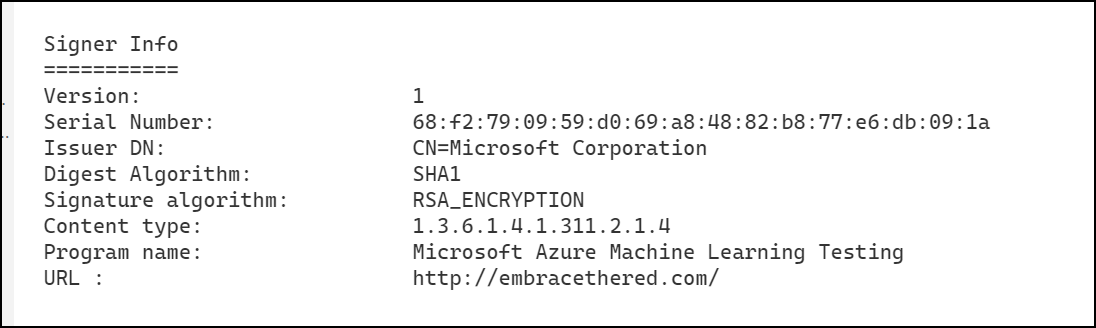
For reference, below is how one of them looks when explored with then Windows UI:
The results were interesting as well, here is an example:
File size (in MB):        0.12402629852294922
File size -signed(in MB): 0.23458099365234375
Result (p)           = [1, 0.9999026665162378]
Result Signed (p)    = [0, 0.3044929319917459]
You can see the file size increased quite a bit with the signature, similarly the score dropped drastically. This was a common pattern - at least for the “Ember” model.
Watching the scoreboard
After that I had about 48 or so bypasses, which had put me in first position on the scoreboard. So I rested for weeks, and wanted to do some more research a few days before the competition ended. Although, I ended up watching the US Open tennis finals - “Go Dominic Thiem!” :)
The night before the competition ended, I noticed being in 4th place - I hoped to make it into the top 3. So, I did another set of variations for the strings used when signing and got bypasses for 84/150 which put me in third spot!
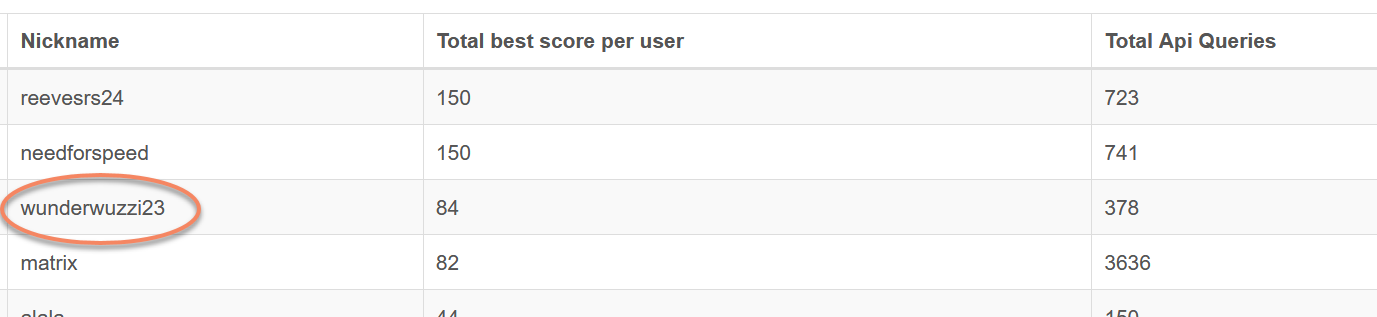
Overall, I used 378 API queries, which I thought was not bad.
UPDATE: The organizers reached out to inform me that I actually made 2nd place. :) There were some issues on how scores got calculated which inflated some of the results.
Thanks to the organizers!
Thanks to the organizers of the competition Microsoft and CUJO AI. I cannot imagine how much works this must be behind the scenes. Having the malware detonate in sandboxes, watch for IOCs to make sure it’s still working and also building the frontend and web UI as well as running all the logistics to make this happen. Great job organizing this!
Cheers, Johann.
Twitter: @wunderwuzzi23
References
- Machine Learning Security Evasion Competition.
- Hiding messages in x86 binaries using semantic duals
- Trojan:MSIL/Chippedout.A!dha
- Lief framework to parse PE
- Ember repo by Endgame, Inc
- Portable Executable Image Explanation
- Modified image “hacked” by Pete Linforth from Pixabay
- Image “binary” by Gerd Altmann from Pixabay
- CUJO AI